Server 2012 & 2012 R2 allow you to move virtual machines (VMs) from one Hyper-V host to another, both inside and outside of clustered environments.
Live Migration
Let’s you move a running VM on one Hyper-v host to another without any downtime. Can be performed inside and outside of clustered environments, however the process is different. Live migration requires a few configuration steps, to begin open the Hyper-v setting on each host
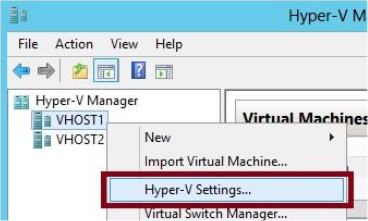
In the Hyper-v setting dialog box that opens select “Live Migrations” from the left
Preparing for Live Migrations
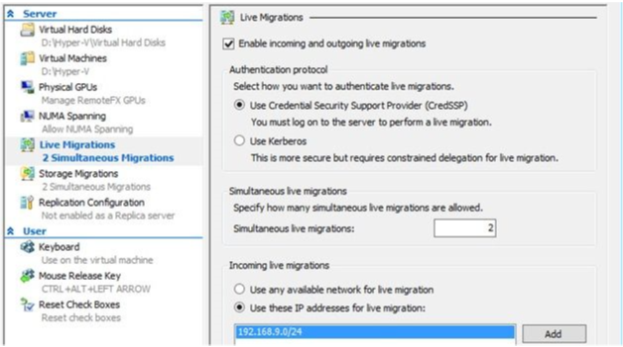
Live migrations are not enable by default, to enable do the following
- Select enable Incoming and Outgoing Live Migrations check box for both the source and destination
- For migration outside of Clustered Environments you need to select the Authentication Protocol
CredSSP – Required no config, need to be logged on to source computer when you perform a live migration, Can’t be done from a remote computer
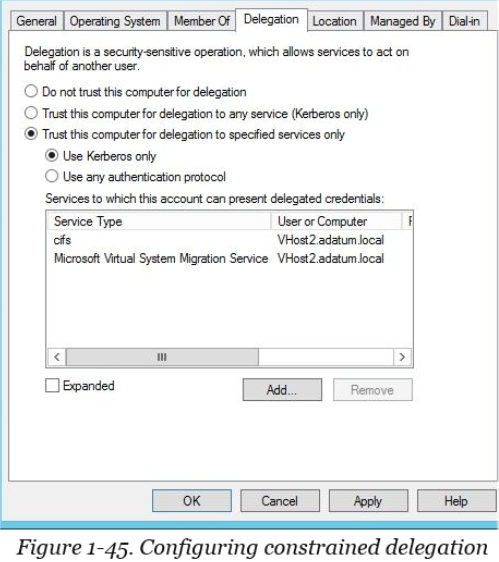
Kerberos – Don’t need to be logged on to the source computer, but it requires configuration; you need to specify CIFS & Microsoft Virtual System Migration Service
Must configure the computer accounts in ADU&C of the source & destination for constrained delegation
3.Set a value for the maximum number of simultaneous live migrations you want to allow. New feature to 2012
4. Add a list of subnets or individual IP from which you want to allow live migrations. No encryption of data during the migration.
5.Although CSVs are not required for VM storage when you perform a live migration, in a fail over cluster they are highly recommended. If the VM is not already stored on a CSV you should move it there.
Moving VM Storage to a CSV
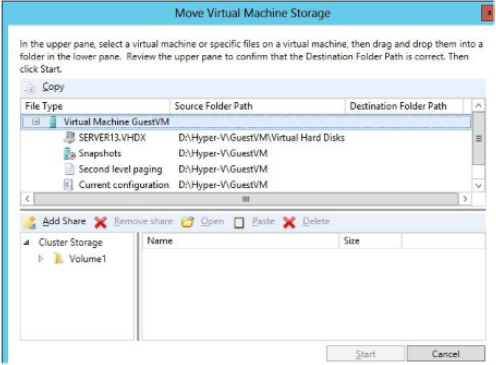
To move VM storage to a CSV, right click the VM in Failover Cluster Manager and point to move, then click virtual machine storage.

Then, in move Virtual Machine Storage dialog select the VM, and drag it to the CSV folder, then click start.
When the transfer is complete you can perform a live migration as long as the hyper-v environments are the same on the source and destination nodes, including the names of virtual switches in both locations.
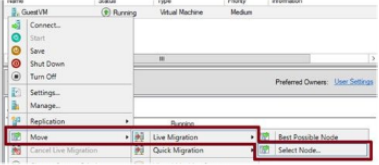
To perform a live migration in Failover Cluster Manager, right click the clustered VM, point to move, point to Live Migration and then select the node from the menu.
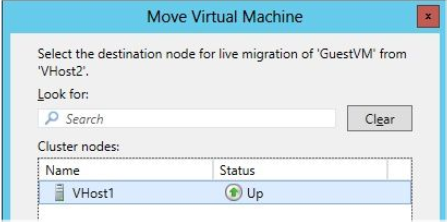
In the dialog box that opens, select the destination node which you want to transfer the running VM too, then click OK to start the process.
During and after migration the VM continues to operate without interruption
Live Migration vs Quick Migration – Quick migration is still available, it saves the VM state and resumes the machine on the destination node. The advantage is that it’s faster from start to finish and requires less network bandwidth. The disadvantage is that the VM is briefly taken offline during the migration process. If minimizing downtime is not a priority and you need to transfer a VM as quickly as possible then Quick Migration is the best option.
Performing Live Migration outside a Clustered Environment
New feature to Server 2012
Move a VM from 1 hyper-v host to another
No downtime and outside of a clustered environment
Source and destination hyper-v hosts must be in the same domains
Process takes much longer than the clustered version, all files need to be copied from one host to another
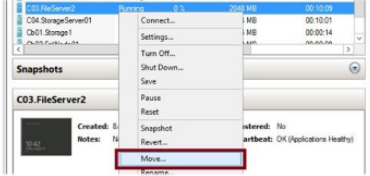
After you have configured the live migration settings the live migration is a simple process. Just right click on the VM you want to live migrate and select move.
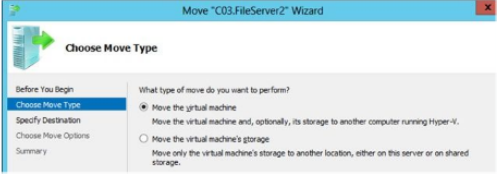
In the wizard that opens, select the “Move the Virtual Machine Option”
Then specify the destination server
Three options to perform the live migration
- Move all the VMs files & storage to a single folder on destination
- Chose to move different items to different folders
- Just migrate the VM leaving storage in place

Additional Migration Considerations
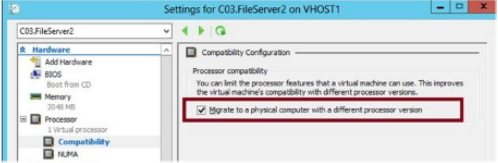
Processor Compatibility – The processor on the source may support different features that the destination. This could cause the migration to fail. If processors are from the same manufacturer you have the option to enable processor compatibility
Set-VMProcessor VMname -CompatibilityForMigrationEnabled $ true
When the processor manufactures are different you cant use live or quick migration, only option is to manually export it from the source and import it on the destination
Matching Names of Virtual Switches – Destination Hyper-v host must contain the same virtual switches with exactly the same names as the source. This problem is detected as you complete the move wizard. The wizard allow you to select alternatives from the one available on the destination and then the live migration takes place.
Using Storage Migration
- Allows you to move the data associated with a VM from once volume to another while the VM remains running
- Useful is storage space is scarce on a volume or array and more plentiful on another
- Three options for how to migrate the storage
- Move all storage to a single folder on the destination volume
- Select which particular storage items you want to migrate such as snapshot data or the smart paging folder
- Specify particular VHDs to migrate only
- Storage migration provides an option that is often the best way to solve a problem.
Configuring Virtual Machine Network Health Protection
Configure a virtual machine so that if its connection to an external network is lost the VM is automatically live migrated to a new host where the protected external network is available
Required multiple network paths between cluster nodes
New feature to 2012 R2, not available in 2012
Configure Drain on Shutdown
New to 2012 R2 – Ensures that VM workloads are automatically migrated off a cluster node if the node is shut down without being put into maintenance mode.
So that concludes the first objective domain of the 70-412 exam “Configure & Manage High Availability”. In the next series of posts we will look at Advanced File Services, Dynamic Access Control and Storage.
Thanks for reading – TSP Admin