Windows 8 & 10 come with a useful built in utility called File History. This feature of Windows automatically backs up the entire contents of all your libraries (both standard and ones you create) to an external USB stick or HDD every hour, which is the default setting.
To restore it’s possible to browse the backups by day and time to locate the exact version you need to restore.
File History is designed to work with an external drive, however it can be configured to use a secondary internal HDD, configured as a network location. This tech note will guide you through the process of configuring a secondary internal HDD as the location for the back up file history.
Step-by-step: Protect your data
- Before we get into setting up and configuring File History I’ll just run through the setup of my PCs HDDs. I have 2 internal SAS HDDs, a 1TB C drive and a 232 GB D drive, also attached is an external USB HDD which is also 232 GB (F). The aim is to use the internal D drive as the storage location.

- File History does not support internal drives however it does support network locations so the first thing to do is create a directory on the D drive, and then share it. Then map a network drive to this location and assign a drive letter, I’m using the Z drive

- Next search for File History in the Windows Menu or alternatively open Control Panel and select File History
- Click on “Select drive” from the left and the choose “Add Network location”


- Browse to the shared folder, in this example is a share on the local PC called FileHistory

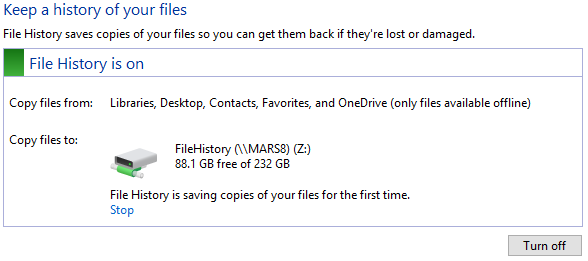
- The click ok and turn on File History
- File History is now turned on

- It’s worth reviewing the “Advanced Settings”, which allows configuration of how often you want to save copies of the files, plus how long to keep saved copies. The defaults are to save every hour and keep saved copies forever. It’s well worth reviewing these two configuration items and choosing more appropriate settings.
- It’s also possible to exclude folders, I have placed my videos folder in this exclusion list
- To restore a previous version, right click the file and select properties, then select the Previous Version tab. Provided the file has changed since the last backup was taken all the version saved with restore points will be in the list.
So that’s how to setup, configure and use File History to back up some of your files, a handy feature you will agree.
Thanks for reading
TSP Admin