Having regular backups of production file servers is incredibly important, I cannot stress this point enough, check your backups every day. However if you find a server on your network that is not being backed up, all is not lost. Fortunately Windows Server (2008 & 2012) has a built in feature called Windows Server Backup.
Windows Server Backup allows the Systems Administrator to back up the entire server, including system state data and all the volumes. It also supports backup to a network location or to an external USB device, which is my personal preference, and this tech note will guide you through the process of setting up a full server backup to a USB drive.
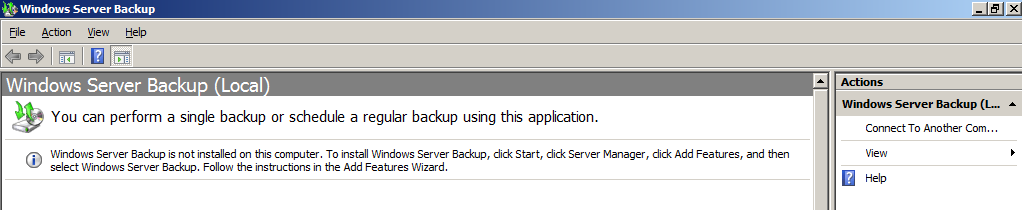
The first thing to be aware of is that Windows Server Backup is not installed by default, see screen shot below.
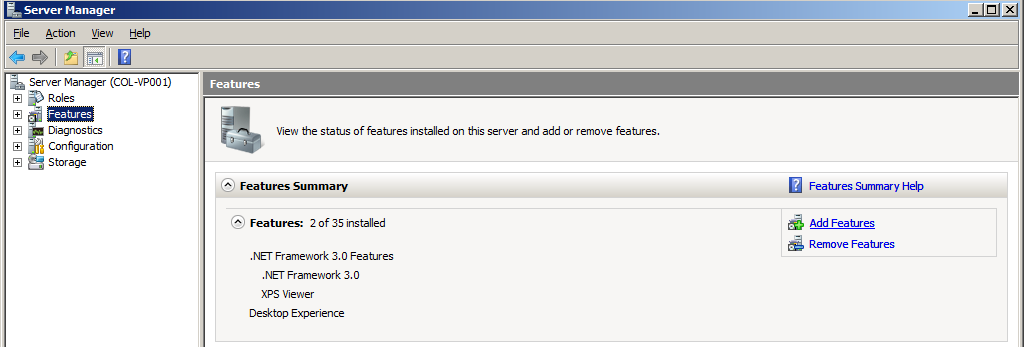
To install use Server Manager and select “Add Features” then select Windows Server Backup from the list.
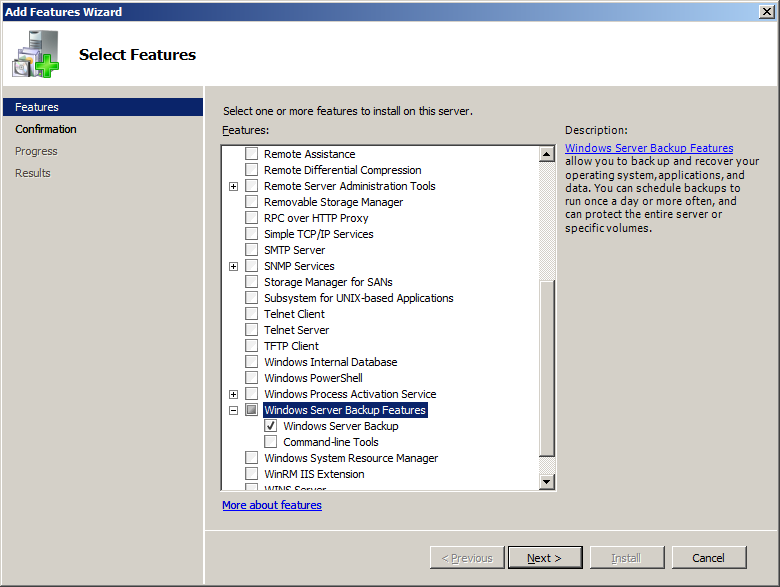
 Next, select Windows Server Backup from the list of available features
 Click Next
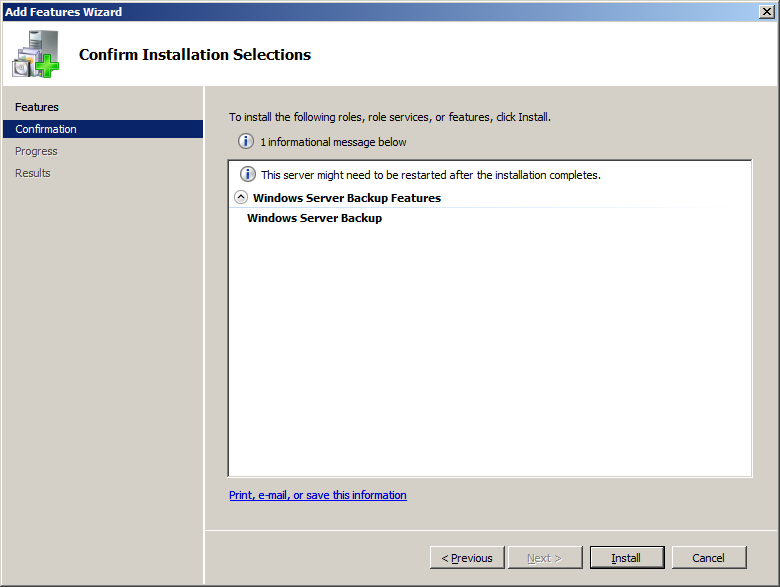
Confirm the selections and if all looks fine select Install, to begin the installation process. The installation process can take a few minutes to complete, however no reboot of the server is required, which I have personally tested on multiple machines.
Installing…


When the installation has completed, the next step is to configure the backups using Windows Server Backup. Windows Server Backup is located in “Administrative Tools” or alternatively use the search facility to locate the application.
When the application has loaded, you have two options, backup once or configure a backup schedule. I’ll will walk you through setting up a backup schedule.
To start, select Action | Backup Schedule

This will launch the Backup Configuration Wizard, which can be seen below

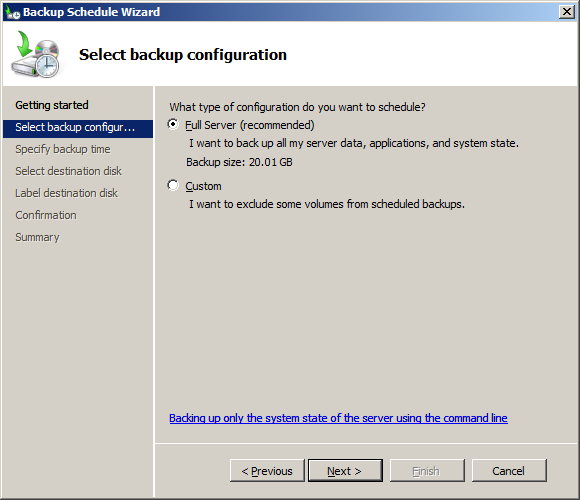
Next, select the type of backup you wish to perform, in this example “Full Server” is selected, which will back up all the volumes and the System State Data.
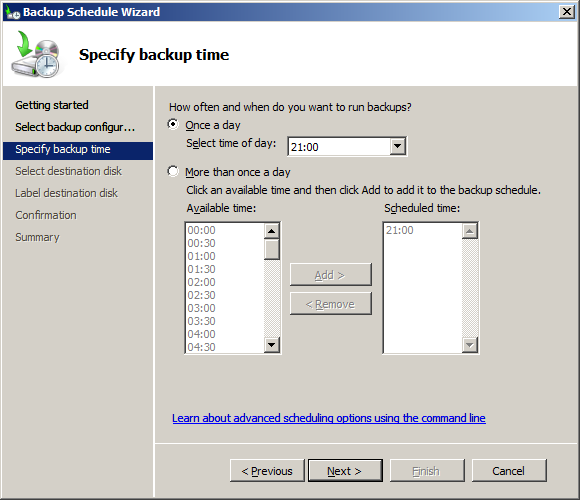
 Next, select the time of day the backup should run. In most production environments I’ve been involved with a good time is between 2 & 4 am, however this will vary depending on the organisation and line of business.
Next, select the backup location. I’d recommend an external USB HDD. In this example a 1TB Toshiba drive was used. One thing to note at this point, is that when the USB drive is connected to the Server, the Windows Operating system may allocate a drive letter, such as the G drive. If this happens you will need to launch Disk Administrator and remove the drive letter before Windows Server Backup will recognise it as an available backup location.

The information / warning message will be displayed. This is just asking you to confirm that it’s ok for the system to format the USB Drive allowing it to support the backup activity in the correct way.
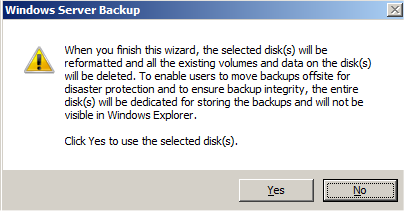
Click Yes to use the selected disk, and after a few moments the Confirmation screen is displayed
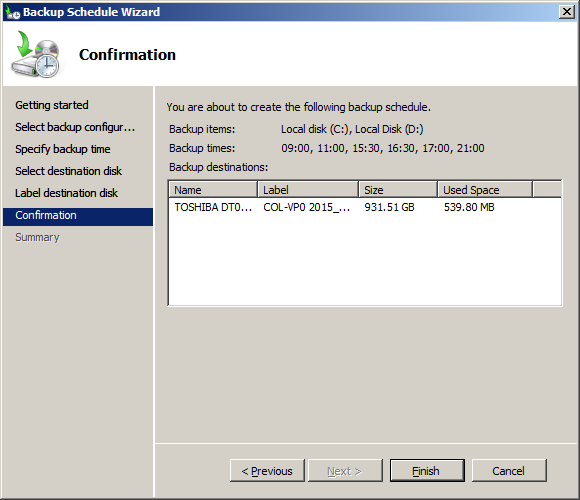
On the confirmation window, review the information presented such as “Backup Items”, “Backup Times” & the “Backup Destination”, then click finish.
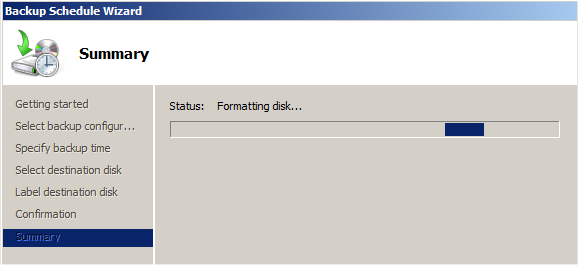
The selections will be finalised, the external USB drive formatted, see below.
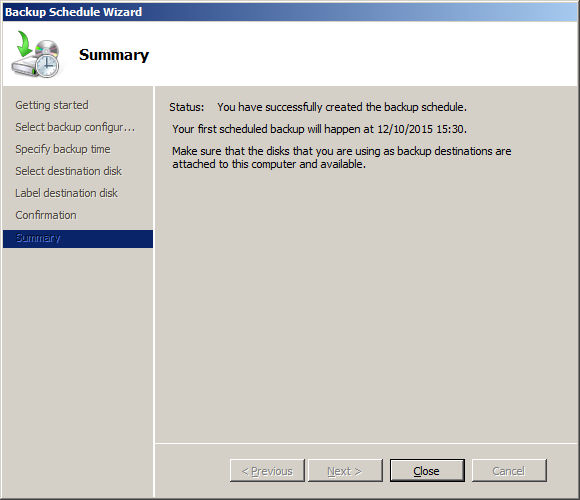
So that’s how to configure a Full Server backup to an external USB drive using Windows Server Backup. The next tech note in this series will detail the process of restoring the C Drive using the backup.
Thanks for reading – TSP Admin