In my day to day role as an IT Pro, I have to visit customer sites to perform hardware maintenance. Today is one of those on days for me. I was tasked with replacing a failing HDD within a server located in a customer data centre. In modern servers a failed HDD is not a problem, they are hot swap. Unfortunately this server is nearly 15 years old, runs Windows NT4 Workstation, and the drive is buried deep inside the machine. The only option is to visit site and replace it.
To get to London from Cambridge I have a few options.
- Take the train from Whittlesford Parkway to London Liverpool Street, then get the underground to Queens Park, which is 5 minutes from site.
- Drive – Not my preferred choice.
- A combination. Drive to Gants Hill underground station, park the car, and then take the tube to Queens Park.
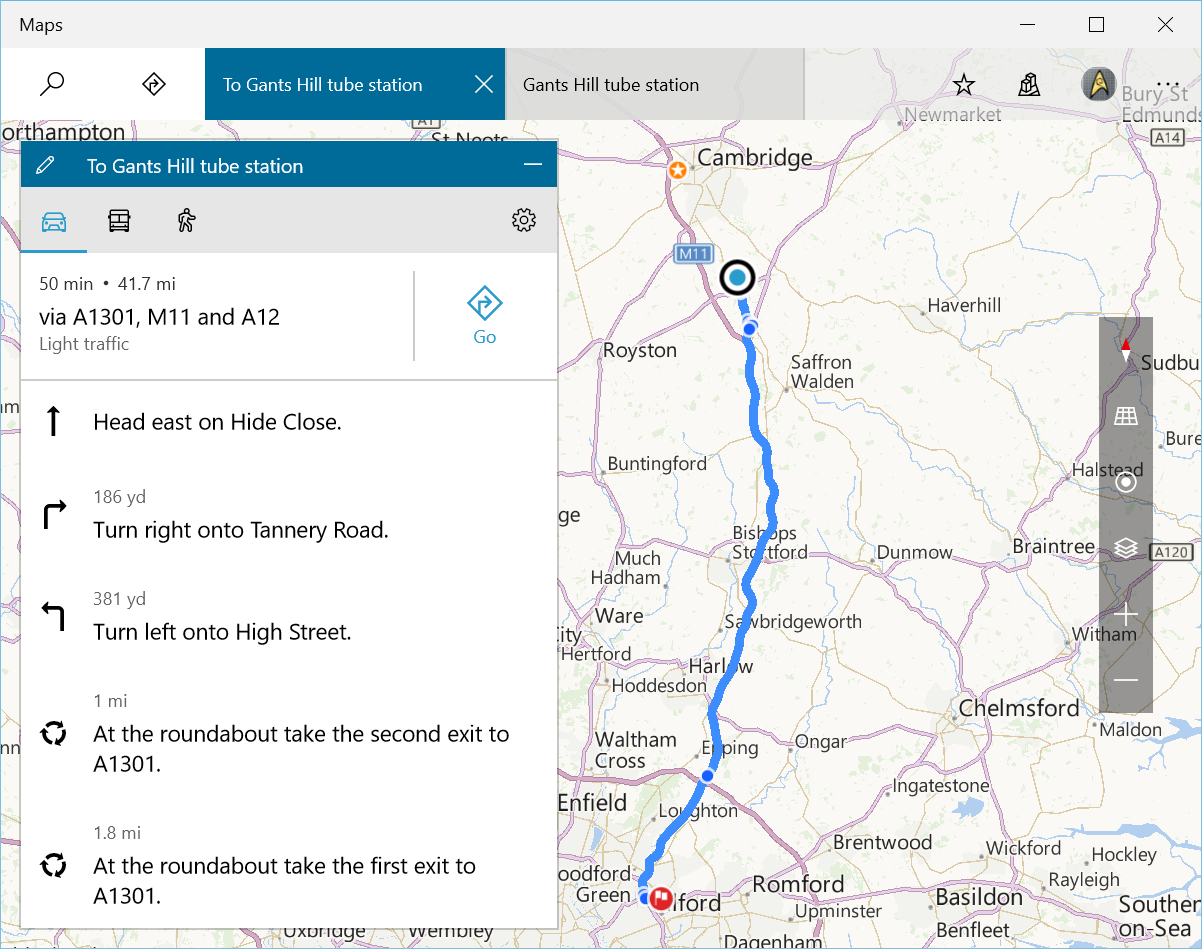
Having made this trip a number of times, the easiest and most relaxed option is number three. The drive from Cambridge to Gants Hill underground station takes approximately one hour. Microsoft maps works out that it is 41.7 miles, which should take me approximately 50 minutes.
Parking at Gants Hill is good value, it works out to be just under £5 for 24 hours. Payment is via the RingGo app, available for IOS, Android and Windows Phone. Screenshots of the Windows Phone version are shown below.

The RingGo app is one of the most useful applications on Windows Phone. I use it all the time and highly recommend it.
The next stage of the journey takes about 40 minutes. The Central Line runs from Gants Hill to Oxford Circus. At Oxford Circus pick up the northbound Bakerloo line to Queens Park. At Queens Park it’s a 5 minute walk to site.
I have two pieces of luggage with me, the first of course is a tool kit, and the second a messenger bag which I use to carry the replacement hardware, along with any software I may need.
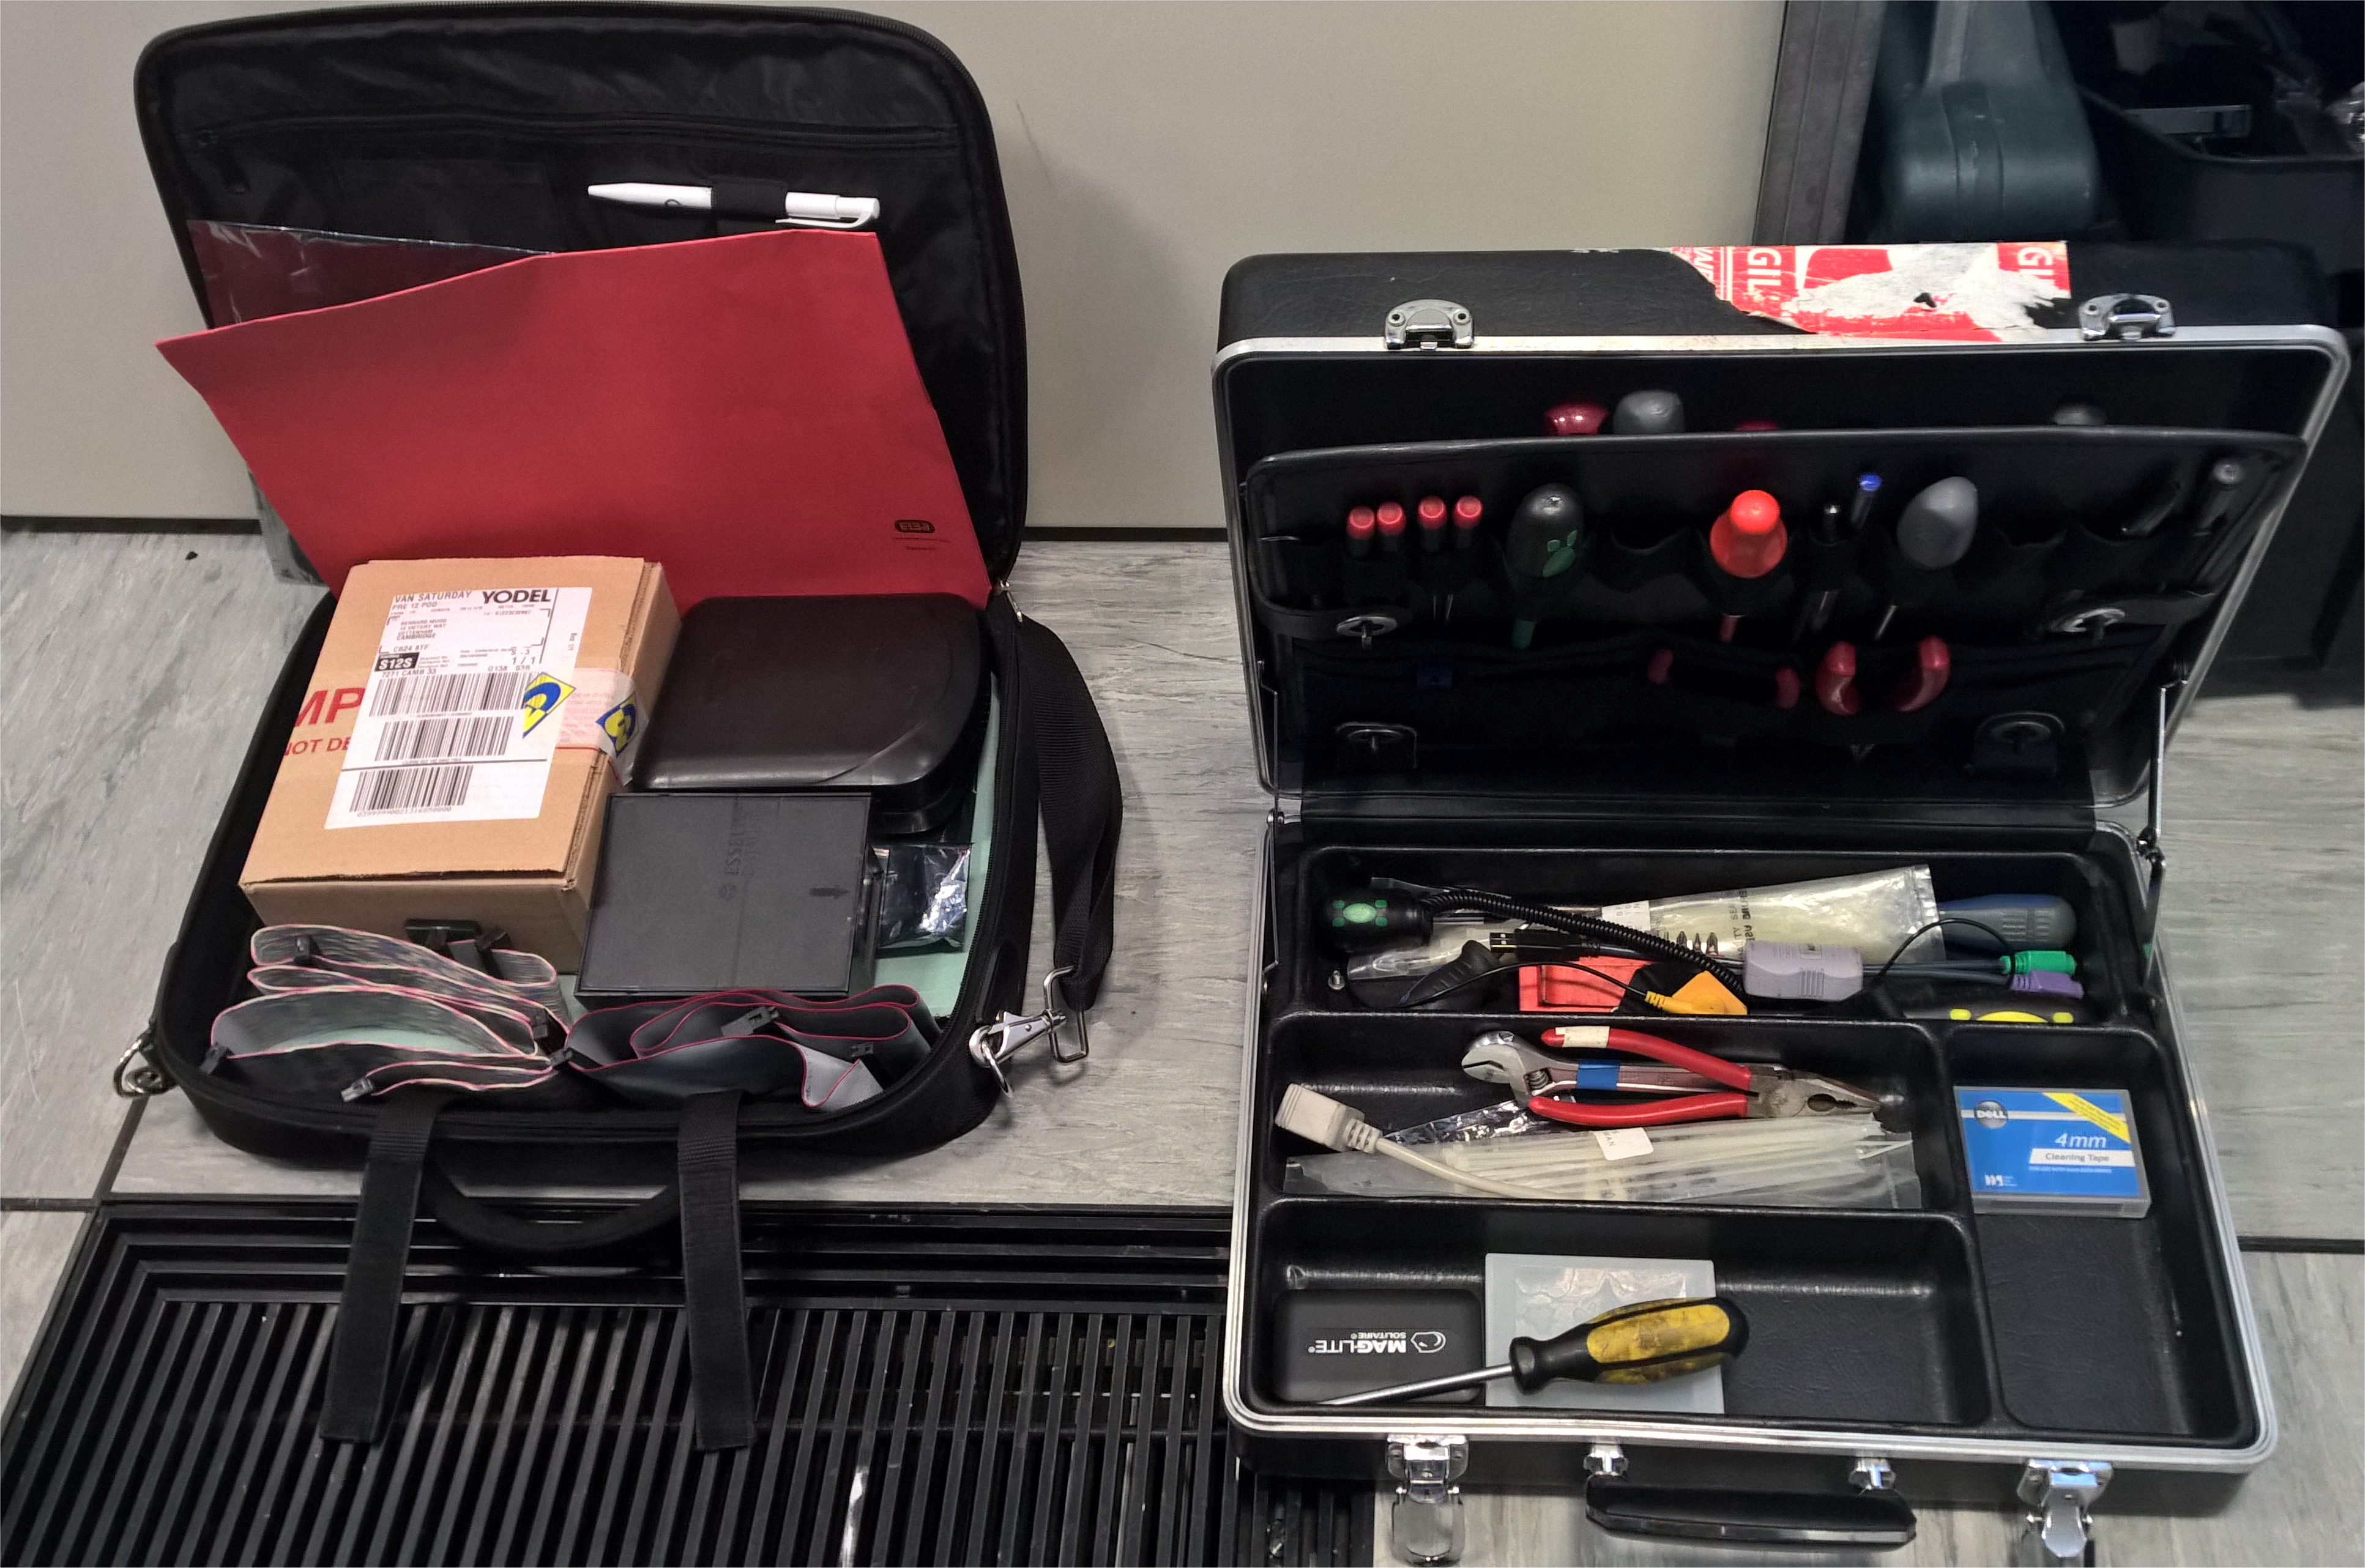
My toolkit contains various flat head and Phillips screwdrivers, wire cutters, cable ties, anti-static wrist band and some labels.
Before removing any server from a rack it’s always good practice to label every cable connected to it, my before and after photos are below.
Before labeling
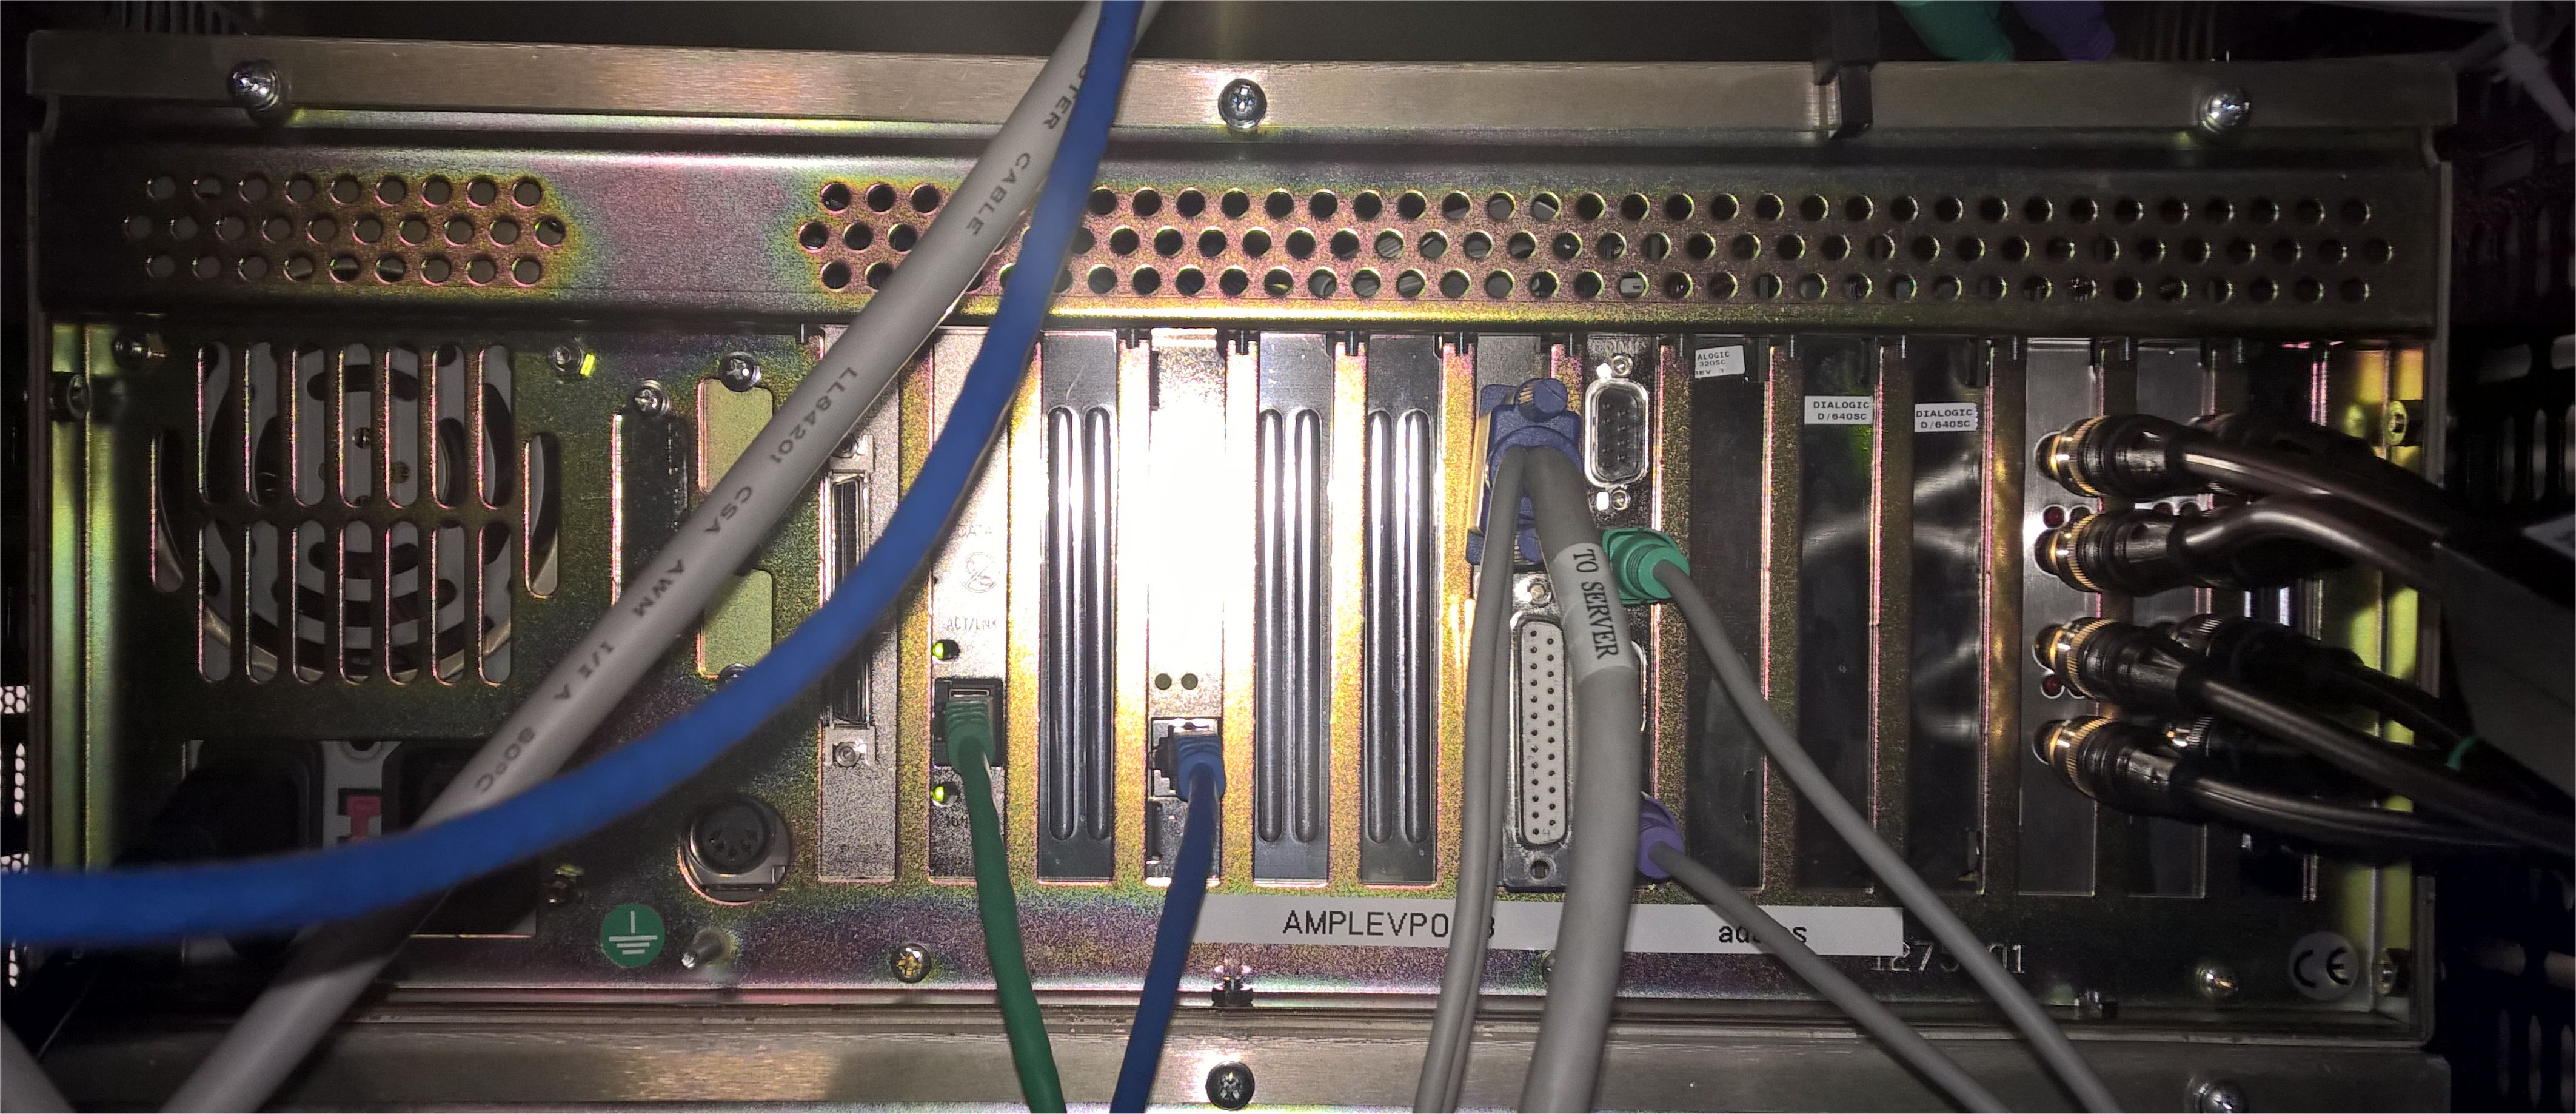
After labeling

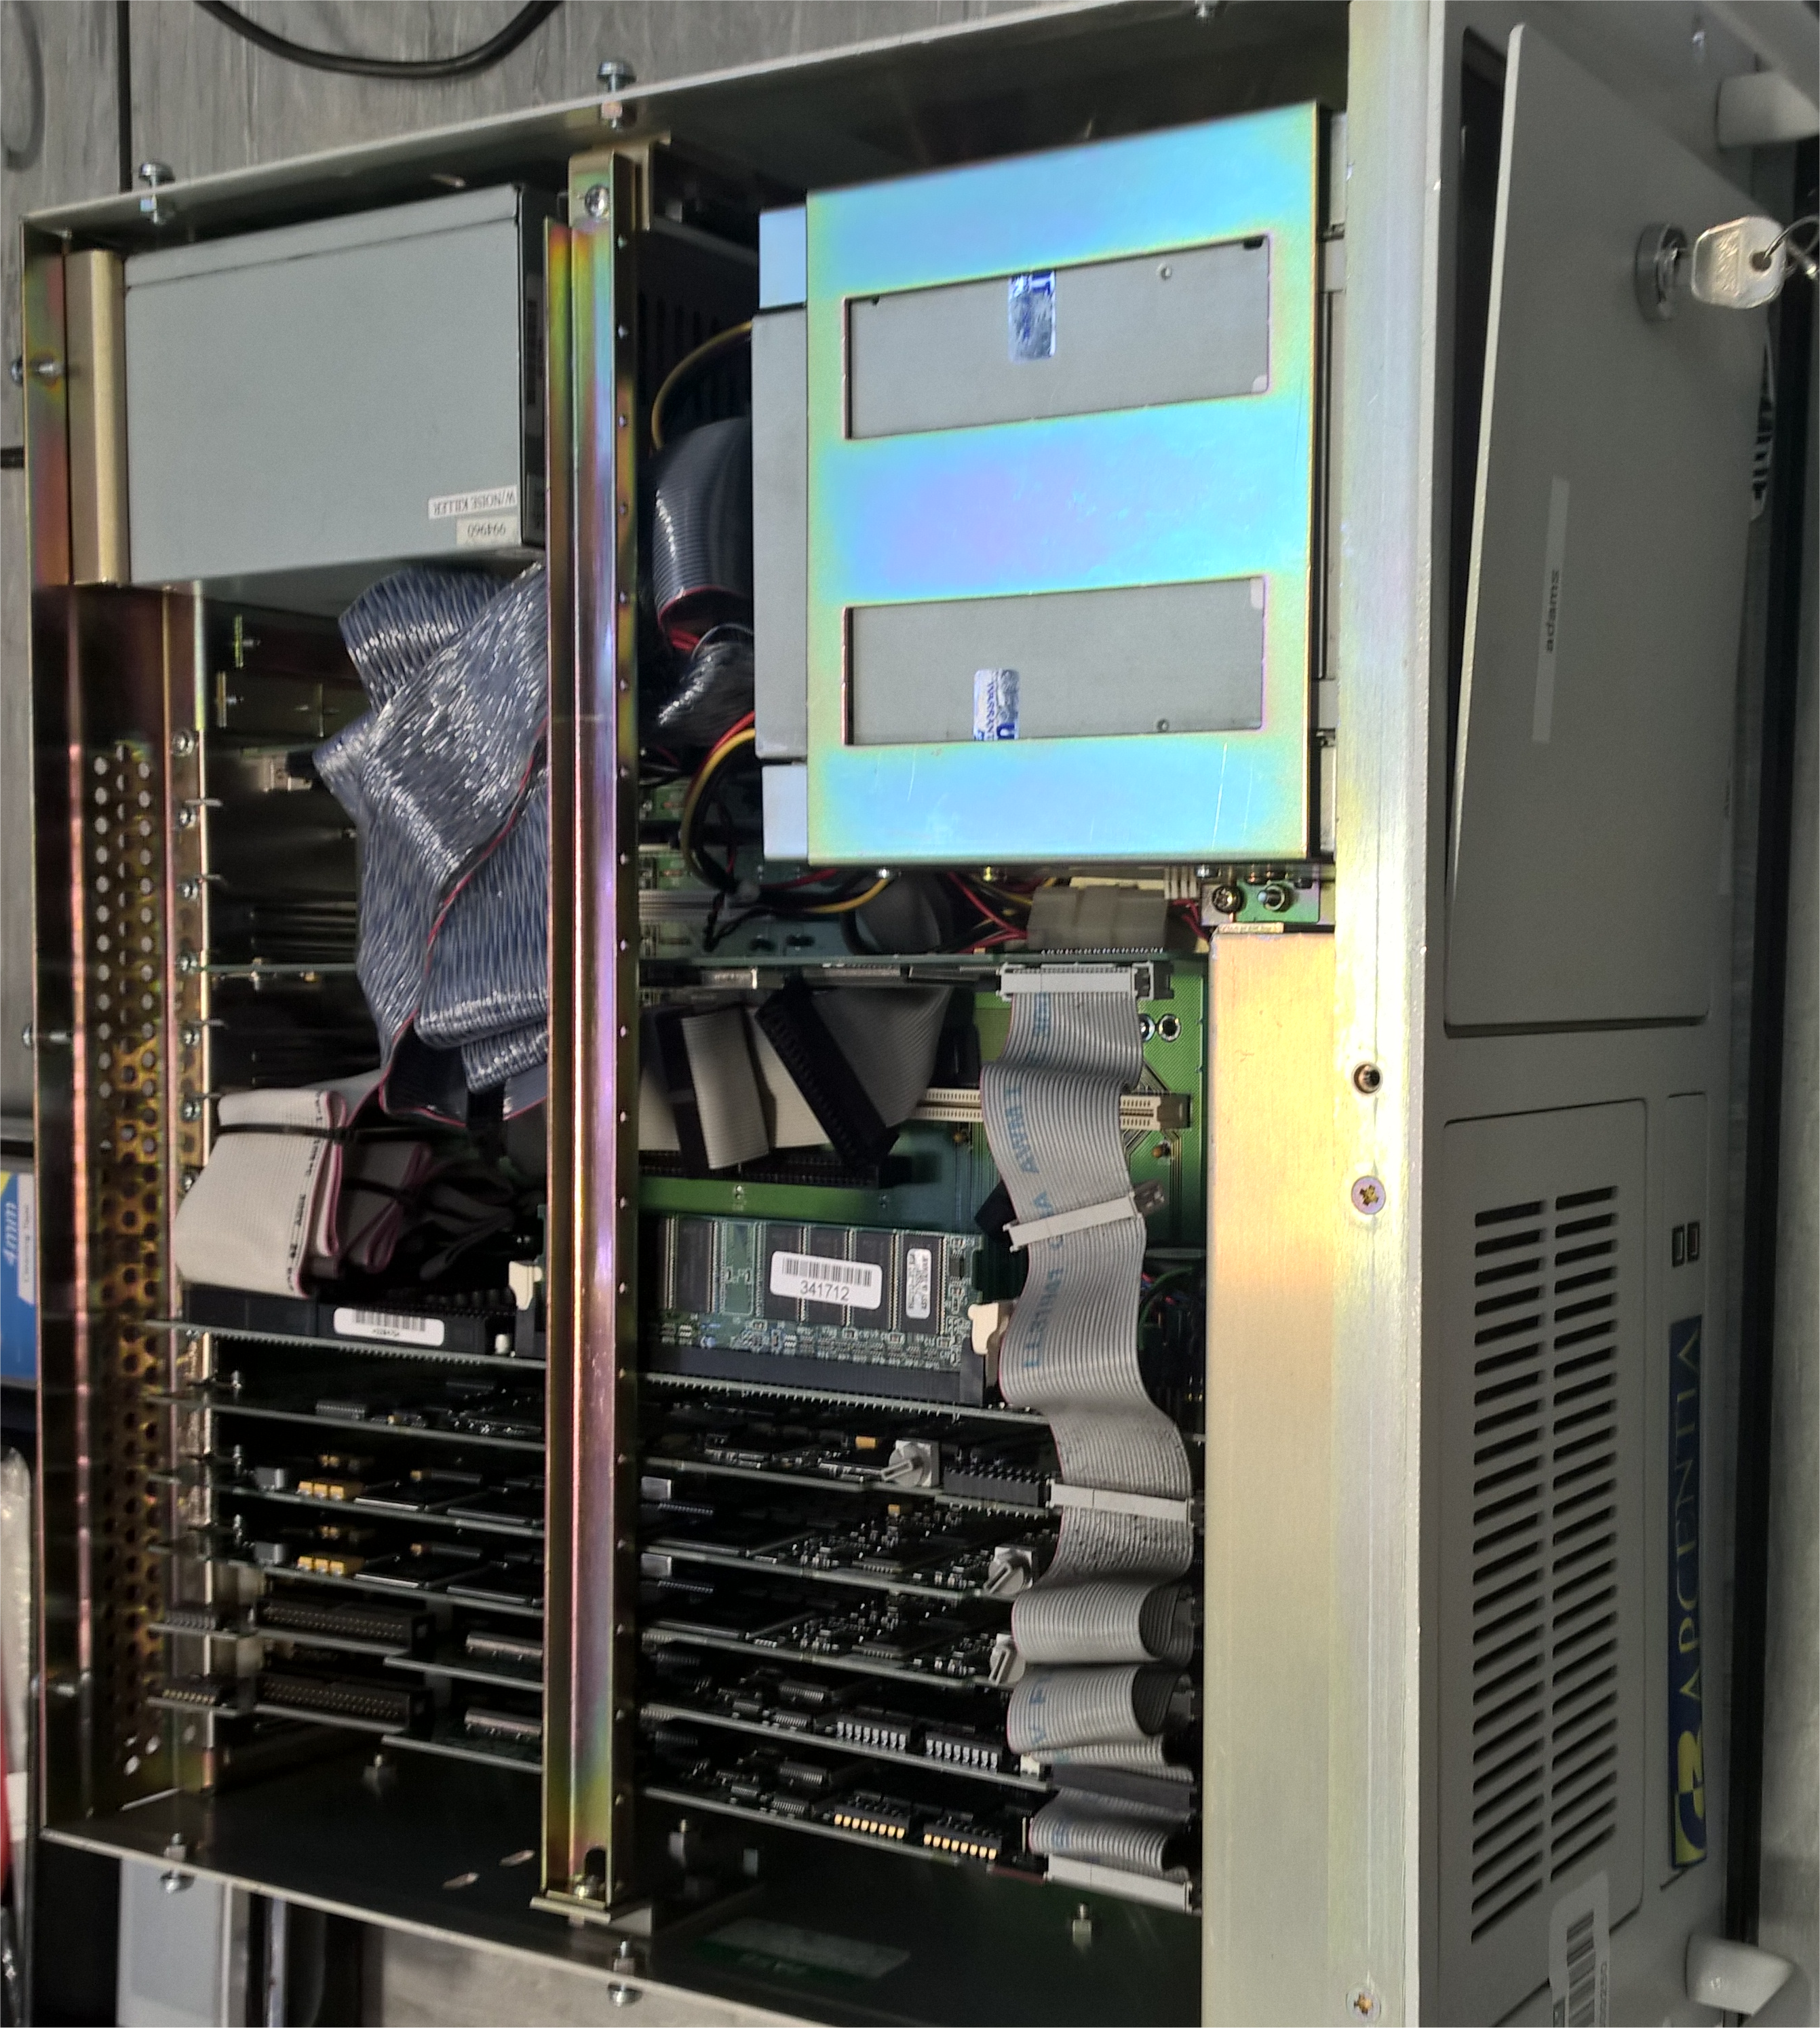
So, with everything labeled up its time to shut the server down, disconnect all the cables and remove it from the rack. Unfortunately on site you don’t get the luxury of a work bench to carry out maintenance on the machine, the bench is the floor of the server room.
With the server out of the rack, replacing the hard disk is just a case of removing the lid and the drive bay. The hard disk is buried deep inside the server at the bottom of the drive bay. Here are a few pictures of the procedure.
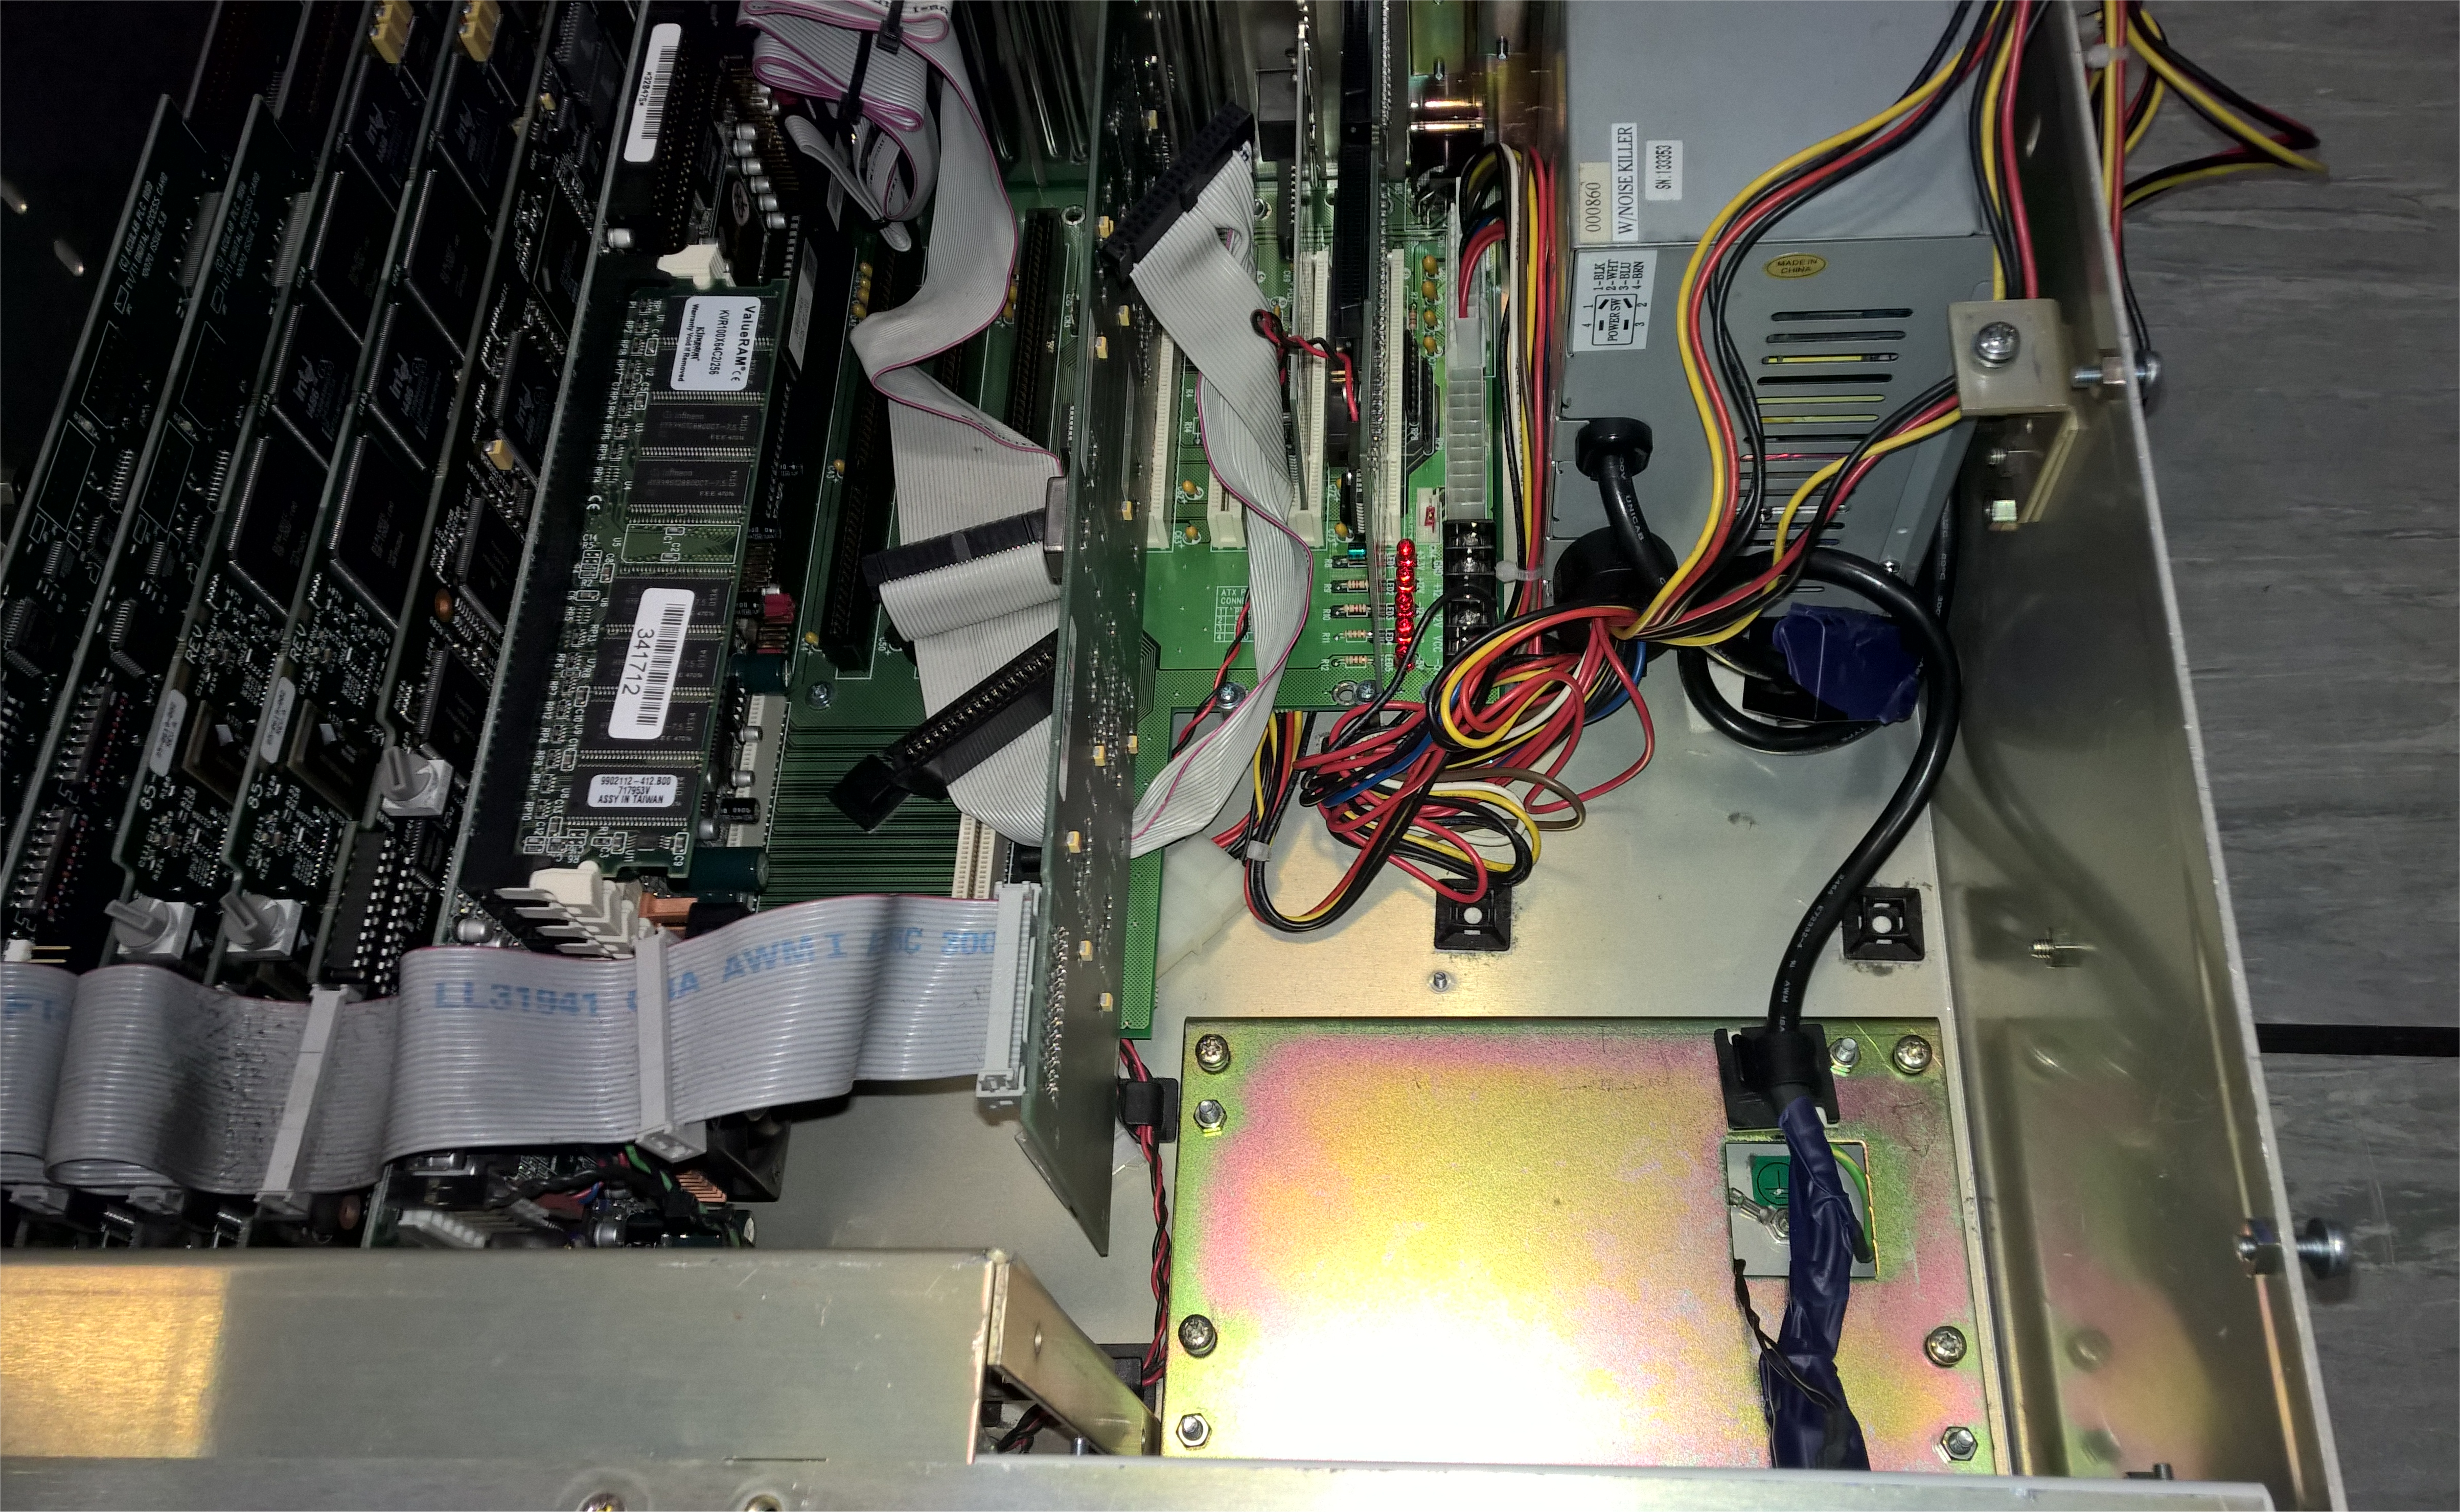

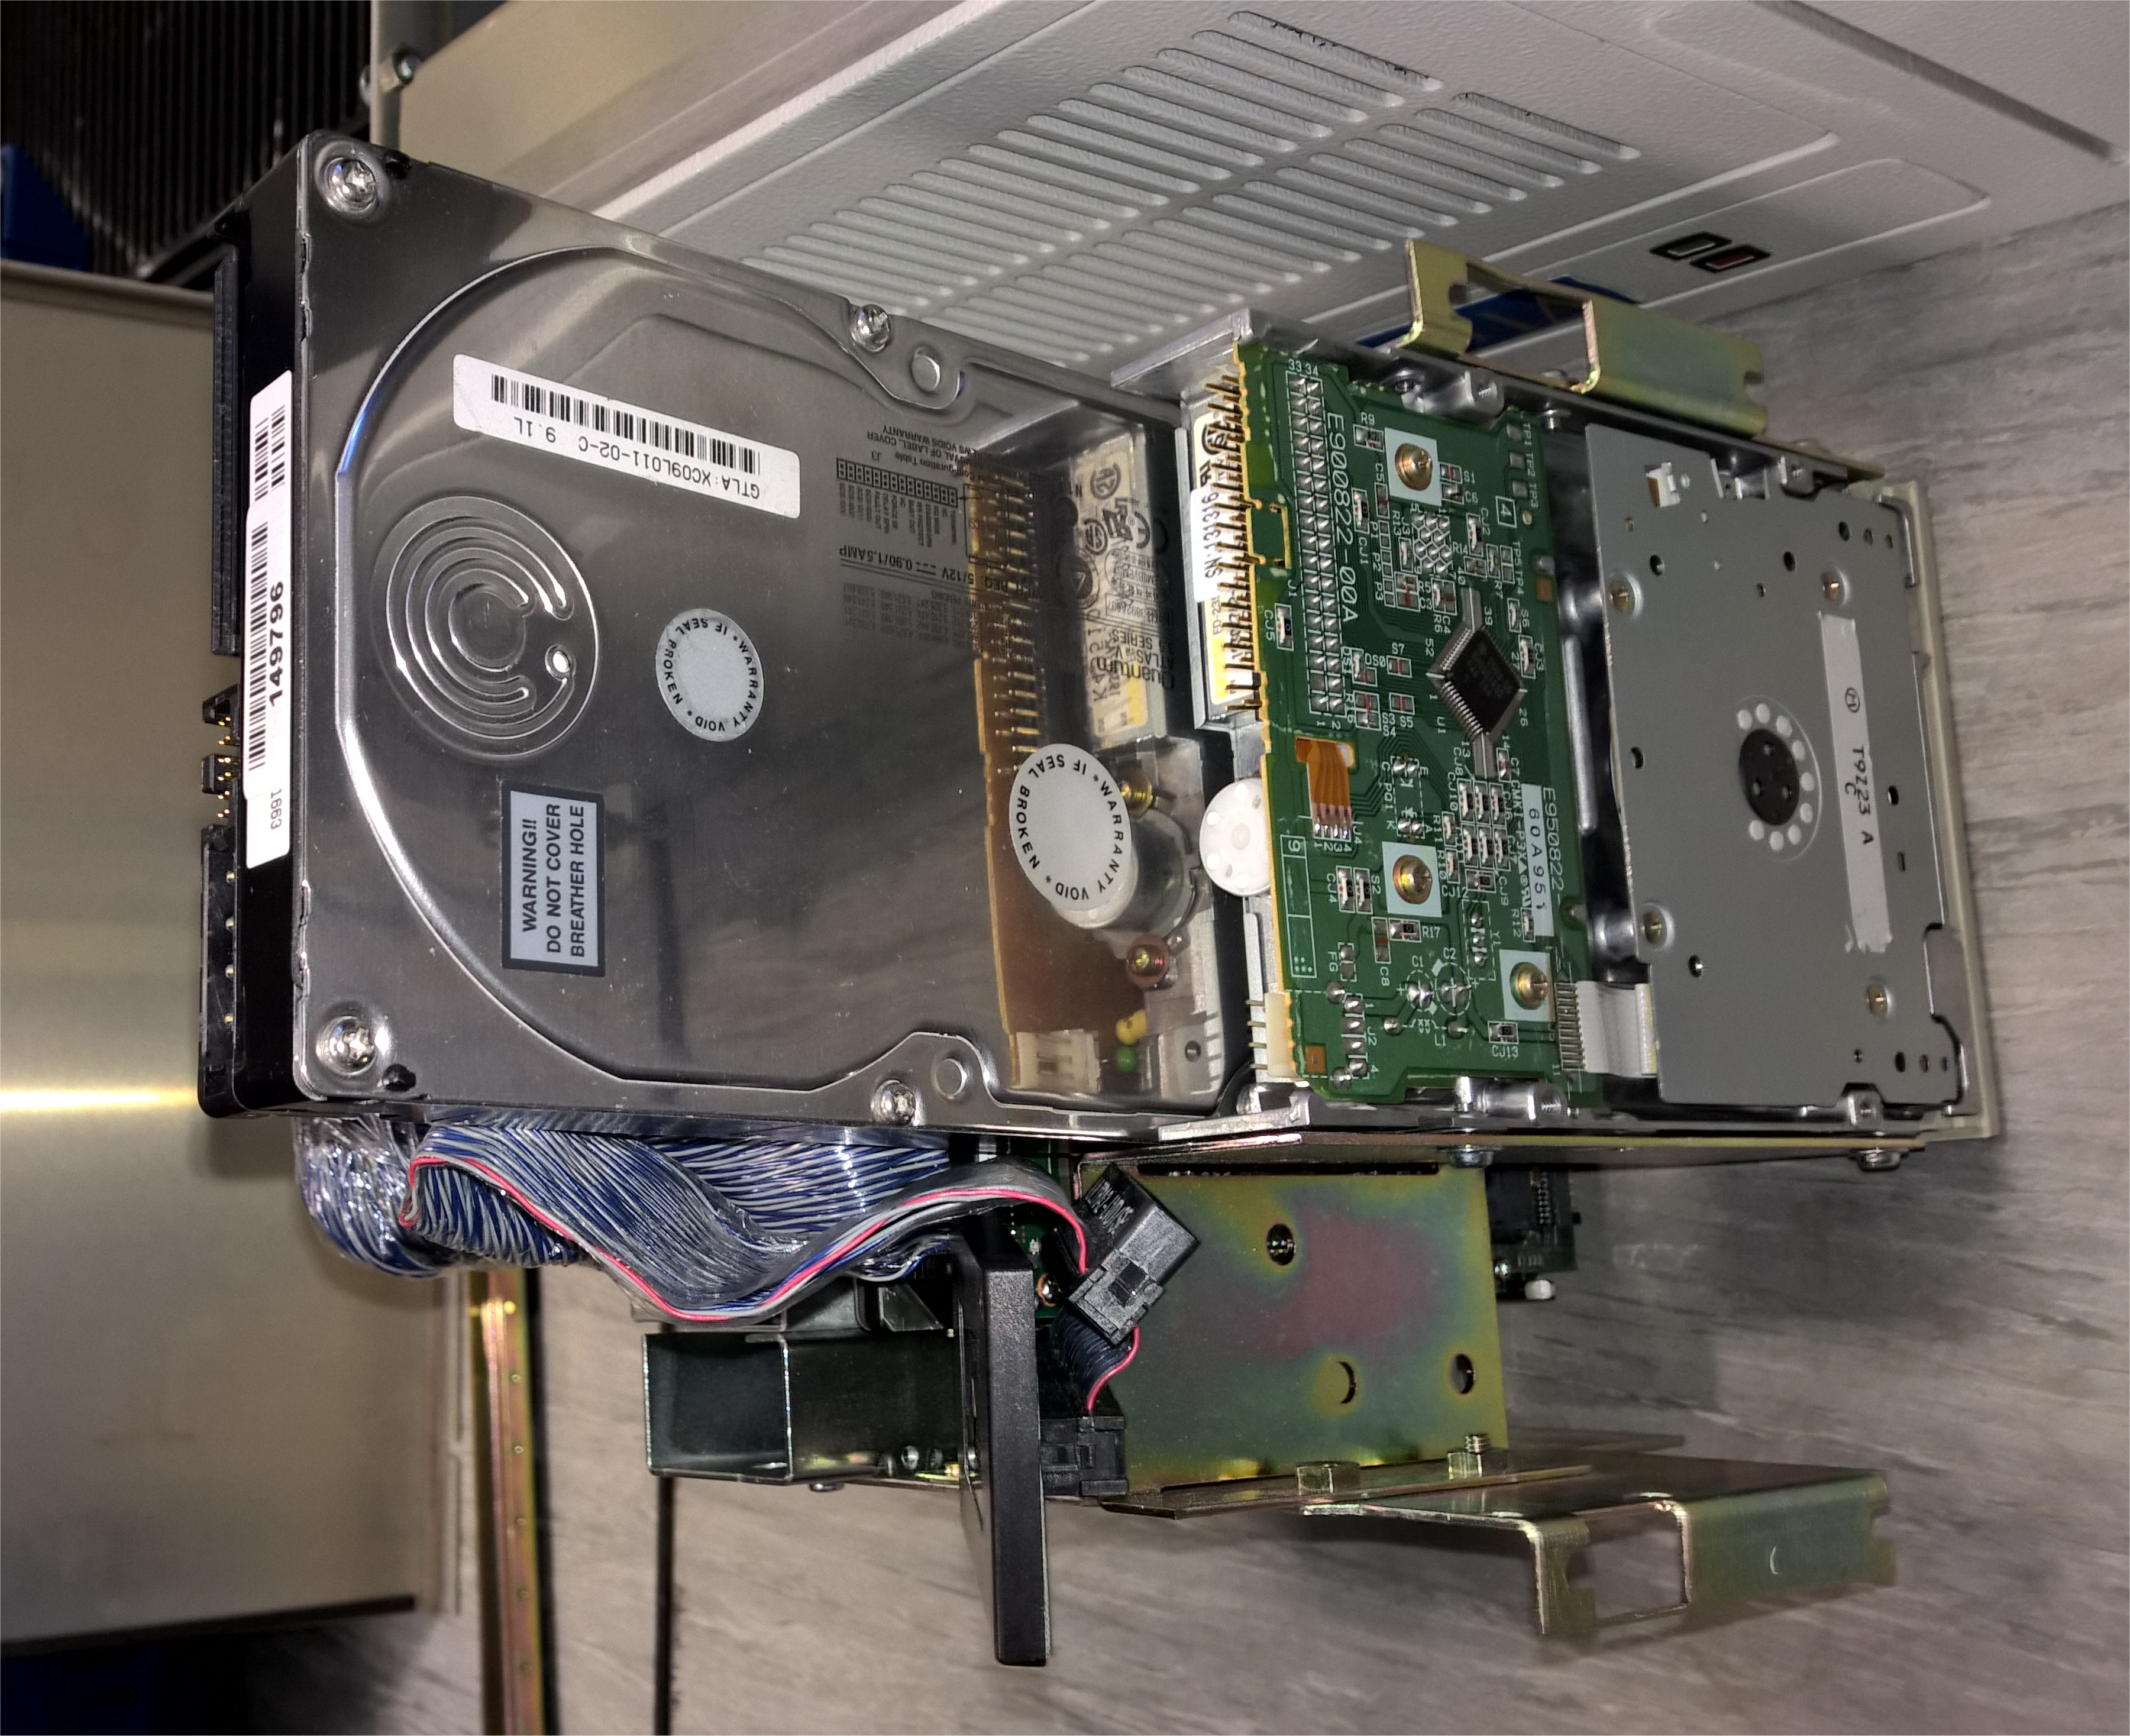
The replacement hard disk had a pre-build system image installed on it. This will allow the server to boot. From there all I need to do is make a few minor configuration changes to allow it to resume its correct operation.
Thanks for reading
TSP Admin