In this post, the second of the “Building a Test Lab” series, I’ll run through how to build a virtual machine using VirtualBox. Although this is a relatively straight forward task, there are a few things to bear in mind, such as the size and location of the virtual hard disk (VHD), the amount of RAM you allocate to the virtual machine and what naming convention you should use for your suite of VM’s.
To start the process launch VirtualBox and click on the “New” icon at the top left. From there is just a case of completing the dialogue boxes that appear.
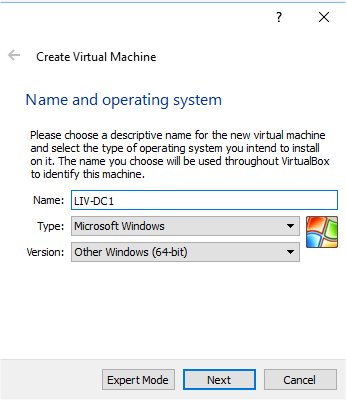 In the “Name and operating system” dialogue box, give the new VM a meaningful name. All machines on a network should have a uniform naming convention, which should reflect the organisation and the machines role. LIV-DC1 meets both these requirements.
Type of VM: Microsoft Windows
Version: For a Windows Server 2012 R2 virtual machine, select “other Windows (64bit)”
 Memory allocation is an important consideration, especially as the host machine we are working on has 8GB. For this first VM, I’m going to give it 2GB of RAM. This should be enough for it to run all the roles and services required, such as ADDS Domain Controller, Certificate Services, DNS & DHCP.
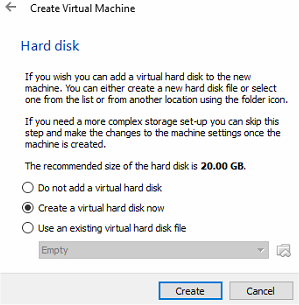 Create the virtual hard disk at this point
 Virtual hard disk files type: I would recommend the VHD format.
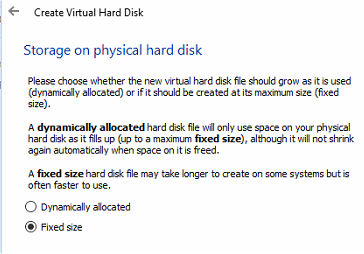 Dynamically allocated or fixed size? Well I’ve used both and to be honest when dealing with 25 GB VHD’s there is not much difference in performance or usage. In this example I have chosen to use fixed size, but either choice would be okay.
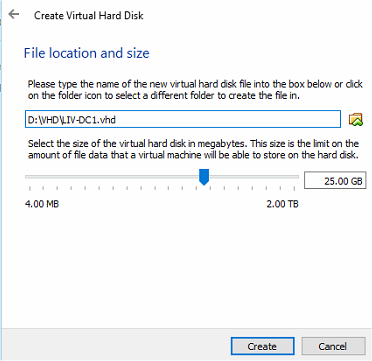 VHD size and location, its important to create the virtual hard disk on a different drive to the one used by the host machines operating system. In my case this is the secondary 230 GB HDD. I created a VHD directory on the root of D: and that is where all my VHD’s will be stored.
The size and be anything upto 2TB, however 25GB will be ample for our purposes.
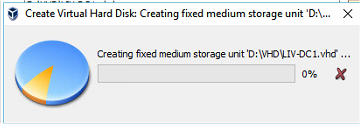
Click create and the system will create a blank VHD, see below
The VM is then created and shown below.
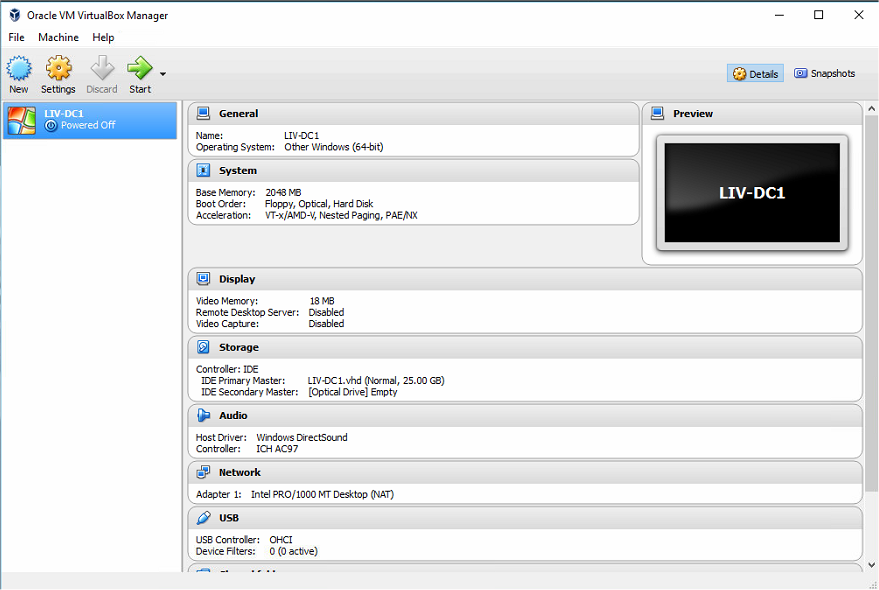
Now with the virtual machine “LIV-DC1” created and powered off, we are now ready to configure the virtual network, install an operating system, and install the Guest Additions on the client operating system, which I’ll cover in part 3 of this series. Stay tuned.
Thanks for reading
TSP Admin